
Using InDesign
The YearTech manual is great at explaining how to use InDesign and Yeartech in general, so I won't bother with a thorough explanation on the details. We'll just go over quickly how to create pages.
Once YearTech has been installed fully, InDesign will have the YearTech toolbar on the top (if not, select it from Window > YearTech Toolbar).
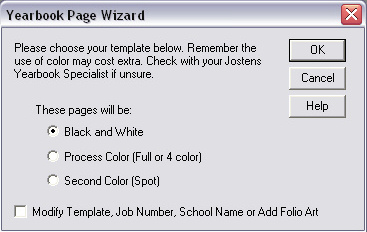 To start making a page, use the Page Wizard button and select the appropriate radio button for colour. When asked for the Starting Page Number, remember that even numbers are always on the left hand side. Leave Folio Text as Modify and you can type in whatever Folio Text copy is appropriate.
Generally with Events pages, we do them in doublepage spreads - InDesign always opens up a doublepage spread. But if you do end up needing to change the number of pages, it's File > Document Setup > Number of Pages.
InDesign will prompt you to save the file in 2006 Yeartech folder - as a note, Jostens has it set up so that within the 2006 Yeartech folder there are several Deadline folders. Save your pages in the appropriate folder so that for every deadline, the only pages in that folder are the ones you're submitting for deadline.
 Placing images just requires you to use the rectangular box tool and the Picture Placer button. Photos are all stored on Yearbook 2, so the path you want is My Network Places > Yearbook2 > Shared Documents > YEARBOOK PHOTOS. Alternatively, typing in \\Yearbook2\shareddocs\YEARBOOK PHOTOS should do the trick.
Remember that when using Picture Placer, Yeartech automatically creates a copy of the photo you place and puts it in the Links folder of the respective Deadline folder. So if you want to remove a photo, you have to use the Undo Picture Placer button. If you just press delete, the copy of the photo remains in your Links folder and everything gets very messy. The Undo Picture Placer removes the photo from Links.
The importance of the Links folder is simply that when you submit, Yeartech gathers all the photos from the Links folder that are linked to that page, and puts them all in a handing Submit folder to be sent off to the plant.
If you have to manually move a page from one deadline to another, remember to move the respective linked images from one Links folder to another as well (don't copy the whole Links folder, because it contains the images from all of the pages in that deadline, not necessarily just the one page you're moving). When you next open the page InDesign may tell you that links are missing - you should just be able to click Fix and the program will find the image files in the new Links folder, but if not, you can do it manually.

Basically, familiarize yourself with the Yeartech toolbar and everything should be fine. Just remember never to delete photos with the delete button!
Editing The Master
What I would like to go into quickly is how to edit the Master. The Master is an InDesign document that acts as the basis for all your pages - anything that you place or do with the Master applies to all new pages created with YearTech.
The Master is found in C:\2006 YearTech\Yearbook Tools\Resource, named 2006MSTR.indt (this may change from year to year, but it will always be in the Resource folder). Keep in mind that the default Master is portrait style, and if you would like the orientation to be landscape, you must ask Jostens for the landscape version, and rename it 2006MSTR.indt.
The Master is edited generally for creating your folio (the image and text at the bottom of each page, containing you page number). Decide on a folio before anything else starts, so that any pages made will already contain these changes.
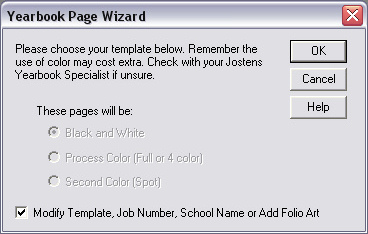
Start by clicking the Page Wizard, and select "Modify Template, Job Number, School Name, or Add Folio Art".
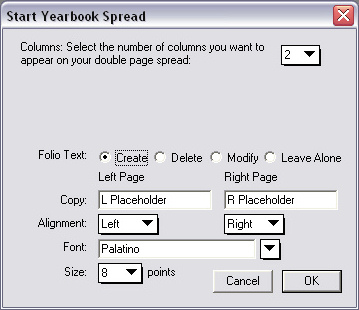
Choose to Create folio text, and select Yes to adding folio art or a style sheet.
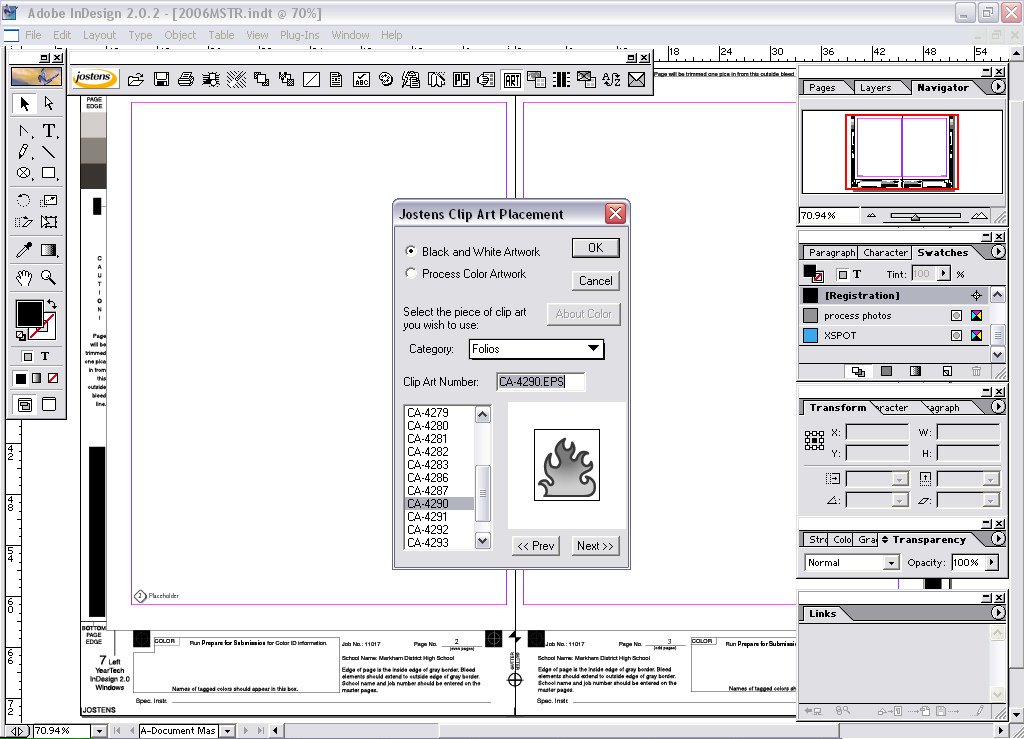 Once the page has been opened, it may be edited as you choose; you can either choose a clip art folio to be placed on every page, or create your own design. Just make sure to save when it's all done.
When picking a font for your folio, remember to use a YearTech font - a poster will come with the Yearbook Kit illustrating all the fonts available, and the font files are on the YearTech Installation CD. Ctrl C, Ctrl V copy and paste the files you want from the CD into C:\WINDOWS\Fonts.
Once the Master has been edited, copy the 2006MSTR.indt file into each computer, replacing the original file in the Resource folder - from now on, any page made using the Page Wizard will use the edited Master as its template. Remember to copy over any fonts as well.
Panel Maker
When it comes time to do the student mugs and the Grad section, Panel Maker is the YearTech tool you'll use to make the pages. There is a Panel Maker guide pamphlet in the Yearbook Kit, but I would like to go over quickly how Panel Flow and Panel Maker work.
When the school does student pictures for student IDs, Jostens receives a CD with the photos and sends back proofs to Yearbook. You'll need to go over these proofs to make sure everyone's in the right grade and has the right name. You'll also need to cross-reference against the alpha list to see who is missing from the student pictures, in order to make a list of who's been missed.
But the student mugs can be done before the proofs come in - in fact, the sooner they're done the better. Decide how many pages you need for the student mugs based on how many students are enrolled in each grade (remember you don't have to worry about Gr. 12s, and keep in mind whether you need to end at the end of a signature - especially if you're using spot colour for the Graduate section, you must end the student mugs section at the end of a signature so that the next signature starts as Graduates, using spot colour). Don't forget that you may want to place candids and surveys interspersed in the student mugs section, so that has to be accounted for.
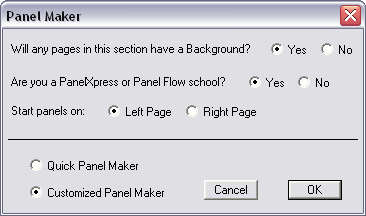
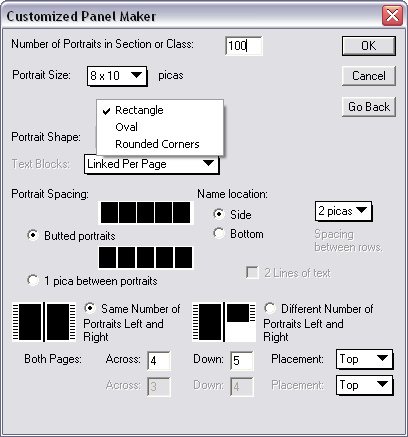
Open up and save a new page, and click the Panel Maker button on the YearTech toolbar. We are a Panel Flow school, and you do want to use the Customized Panel Maker. The next window will allow you to customize the pages with the number and size of photos. If the first selections you make don't turn out the way you want them, just delete all the photo boxes and start over again.
The way Panel Flow works is that you send the mugs section template to the plant, and the plant will "flow" in all the photos. That is, they'll place every student mug, as well as the names of the corresponding students.
The flowing in of names is particularly important, because you'll see that the text boxes placed by Panel Maker are linked. Each box is connected to the next, and text you type in one will overflow into the next. 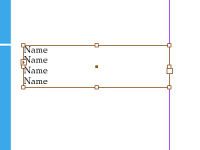 This is done for ease of flowing by the plant, so it's important that when you make these pages, if you need to move the text boxes around, you keep them in the same order that they are linked in.
If you need to make new text boxes, copy and paste them from the last linked text box, and then link them manually. When you click on the text box using the black arrow, you'll see that there are two small boxes, one on the left and one on the right of the main text box. 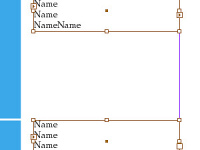 If they are both filled with a small arrow it means that this text box is linked forward and back. If there is one in the left box but not in the right, it means the box is only linked to the previous text box. In order to link a textbox to the next one, click on the small empty square and place your cursor over new (or copied) textbox.
 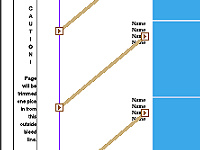 Your mouse will change into two links - once you click on the new box, your two text boxes will now be linked.
As a quick tip, you can visually see how the textboxes are linked, click on a textbox, then go View > Show Text Threads, and thick tan lines will show you how the textboxes are linked to one another.
For the Graduates section, it's slightly different. You can use Panel Maker to make your image boxes, but you'll delete the name boxes, because those will be placed by yourself, in an unlinked format. The way we've done Graduates pages in the past is that we make empty photo boxes for all the Graduates, we insert the names and the blurbs and then we send the file to the plant to have them place the images (simply because if we waited until the plant sent us the Grad photos, we wouldn't be able to meet our deadlines). Because we write in the names ourselves, the text boxes don't have to be linked.
One last thing is that when you use Panel Maker (especially for the Graduates section), generally you'll want to fill the last page with image boxes, even if the number of boxes is more than the number of students you know you'll have. When this happens, once you've submitted the page to the plant, they'll send you back a CD called White Space. The White Space CD will contain the pages you sent, with photos flowed in. Whatever photo boxes weren't filled now must be removed (save the file to a Deadline first, because you can't work on the CD) and replaced with a "We Missed You" list and/or candids.
The one exception to all this is the teachers section. Usually, about 50 teachers will take pictures with Jostens, and you'll receive those in the proofs. However, you'll want to take your own photos of the teachers to fill in the gaps of the ones who didn't. The way we usually plan out the teachers' page is to take as many pictures on our own of teachers as we can, add that number to the number that took photos with Jostens, make Panel pages with exactly that number, and then place the photos that were taken on our own, leaving blank photo boxes for the photos taken with Jostens, going by alphabetical order of teacher name. What you'll end up with is a couple pages with a mix of blank photo boxes and placed photos. Unlink the text boxes for photos that you've already placed (you can cut the box out and right click > Paste In Place the box, and it'll come out unlinked, but then you'll have to relink the ones that weren't removed) and type in the names of the teachers yourself. Do a We Missed You list, fill extra space with candids, and then the page can be submitted to the plant and they'll fill in the rest of the pictures and names.